Advanced PowerPoint: Animating with Tabbed Layers (With .PPT Download)
A couple of weeks ago I posted a video of a sample PowerPoint animation inspired by the 1953 edufilm "A Is for Atom." I have been waiting for the right platform to serve files from so I could offer downloadable .ppt files for others to examine. Last week Google added several file types to its free Google Base, so you can now go there to download example files of my PowerPoint animations. Google Base offers a nice "hub" where I can store multiple files, so that page will become more of a resource as I get more materials up there.
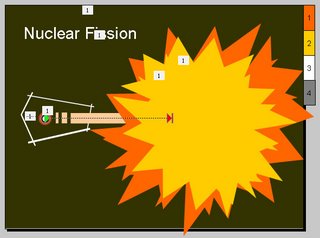
The first PowerPoint I'll post here, my "F For Fission" PowerPoint (click the link at the bottom of this post to view the YouTube video of the animation), illustrates how useful it can be to peek under the hood of a complex PowerPoint animation. Each slide in the animation contains many animated steps of different types, and the ways in which they are combined can sometimes make it difficult to intuit their construction from their outward effects. All of these are custom animations, not animation schemes; for advanced animations, animation schemes basically useless except for very specific applications.
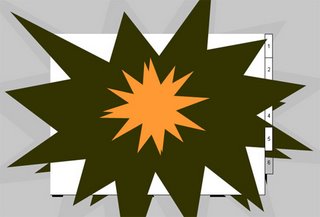
A complex animation can often take dozens of steps to complete, and PowerPoint isn't exactly designed for the kinds of things I want to do with it. As a result, in the process of "hacking" PowerPoint to create complex educational animations I've come up with several techniques for managing the many layers of activity. What I'd like to draw attention to in this example is a technique I developed for dealing with large amounts of visual material that needs to coexist on a single slide, often layered or intermingled in such a way that many components are difficult to access and manipulate. It's a simple method, but I think it's a new one: Tabbed layers.
The process is simple.
- Group all elements together that PowerPoint will apply the same effect to at the same time.
- Create an Autoshape rectangle about 1/2"x1" and position it beyond the slide edge like a file folder tab. Give the tab a name or number. I use numbers combined with relevant colors for convenience's sake, but you could use short text tags if you created your shapes at 1"x1/2" and then rotated them 90 degrees counter-clockwise. Copy-paste this tab several times to give yourself some extras.
- Group the combined to-be-animated elements with the tab.
- Apply the animation.
- Repeat.
It's also important in advanced PowerPoint animation to consider your stage to include large areas of the off-slide canvas. In the case of this presentation's chain reaction sequence, a long grouped object representing the previously shown sequence involved in the splitting of a uranium atom pans across the screen. Once the pan is complete, certain parts are invisibly replaced using subtle exit and entrance effects so that the free electrons at the end of the pan can be animated independently. (This is preferable to attempting a pan of several elements across the slide at once - it is difficult to align their speeds to make them look like they are moving together.)


No comments:
Post a Comment